Tuesday, September 12, 2017
Sunday, February 26, 2017
Homemade Milling Machine
Alright everyone! I've been away a while, so here's something good.


And a link to the video below:
I designed this milling machine because acquiring a "proper" Bridgeport type mill seemed all but impossible. Large mills are either too heavy or too expensive, and those small bench top models are rarer than black rhinos.
This milling machine was entirely constructed in my garage, making use of a 9 inch South Bend lathe, a stick welder, angle grinder and a pedestal drill press. I machined a morse taper 3 spindle,which accepts common taper tooling, and the head of the machine. The head-spindle assembly mounts angular contact bearings which will actually handle the loads incurred during milling.
The most expensive part of the machine was the the x-y table, which I purchased from Grizzly. Its the 6x18.5 inch, which runs $170 shipped. Total cost of the machine was approximately $270, not counting scavenged parts like the motor, or screws and assorted hardware.
This is, as far as I'm aware, this is the only homemade machine of its kind, with a proper milling head that accepts mt3 tooling, making it extremely versatile. Besides already existing mt3 end mill holders, I've found that you can buy old useless mt3 drill bits by the pound and readily modify the shank for even more endmill holders or flycutters and other tooling.
Also note that I did NOT require a larger milling machine to build this one! Yes, I know there are purchased parts. However, the intent of this design is that anyone with a bit of cash and practically antique shop tools can build a useful milling machine.
There are a number of attempts at building homemade mills on youtube, some of which definitely contributed to my design. This mill is unique for the fact that its large capacity. I have 12in x 8 in x 9 in of machining volume and the rigidity in the spindle and the rest of the construction to to easily cut 1/4 in deep 1/2 inch slots through aluminum. This is a useful machine for "small engine" sized work as opposed to its tiny experimental predecessors.
Soon, I'll be posting some technical drawings of the machine, any maybe even solidworks models. Watch the youtube videos and subscribe to my channel!
Stay tuned!
Thursday, August 29, 2013
A Cannon
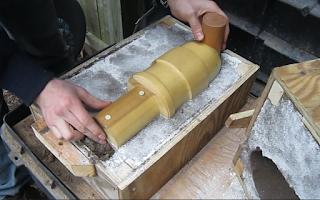
What says "thank you" like a beautiful cannon? I just finished this new piece. Its a six and-a-half inch long aluminum cast dahlgren pattern cannon. It also came out exceptionally nice.
Freshly cast
Complete
Boring out the barrel
Facing off a wheel
Faced off
Now the other side gets formed
Center drill for the hole
Drilled through
A complete wheel
Cannon pieces ready for assemly
Glueing up the carriage
Ta-da!
Thursday, August 1, 2013
A month and a half ago, two friends along with myself decided to build a large trebuchet. I had built a sizeable trebuchet before using recycled wood from my old deck. It stood about 8 feet tall and hurled a projectile over 100 feet. The materials were not of high quality though which limited the power of that siege engine. The new trebuchet was to be larger but most of all stronger, built of better materials and constructed with superior methods.
The old trebuchet
The frame would be be built from pressure treated 4x4 posts and 2x4s. All the joints would be glued and pinned with wooden dowel for a more tradional look and good strength. Special attention was paid to the throwing arm. The earlier trebuchet was failing at the main pivot. The steel bar serving as the axle stood firm as the wooden arm sagged downward under 70 lbs of counter-weight. The hole through the arm had gone out of round and generally allowed for lots of wobble. The new trebuchet would have a laminated wood throwing arm with flange bearings to take the load and reduce friction for better performance.
Flange bearings, one inch steel axle, and bolts.
This trebuchet is designed to shoot an object weighing two pounds well over 200 yards
The frame, to be glued and pinned
Throwing arm glued and clamped
Posts all mitred ready for assembly.
Because this engine is planned to have a great range, firing it in the neighborhood is right out. That makes transporting this beast necessary. Each side will be glued solid. These solid sides will bolt to the base. Lateral bracing has been designed to bolt on as well.
More to come!
Subscribe to:
Comments (Atom)


